
To create a flawless eye makeup look, you need to master the art of applying eyeshadow properly. You can learn how to blend different shades using an eyeshadow tutorial, apply shadow to the eyebrows, and create a hooded eye look. This tutorial will also show you how to use red lipstick as eyeshadow.
Blending eyeshadows
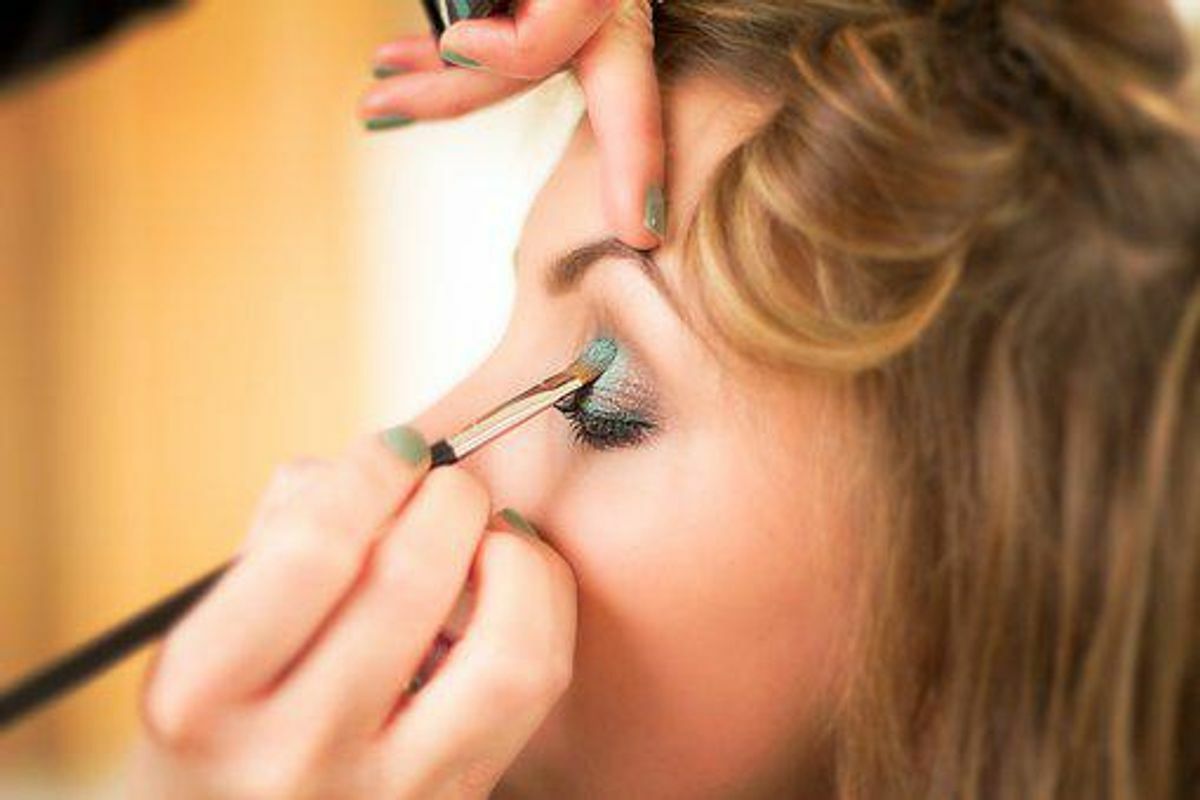
Blending eyeshadows is an important step in creating an eye makeup look. It will create a smooth transition and give your eyes a more dimensional look. To create a blended look, apply the darker colour to the outer crease and blend it using small circular motions. Make sure the brush is small and fluffy.
The process for blending eye shadows can vary depending on the type of eye shadow that you use. If you use a metallic or matte eye shadow, only blend it in the crease. Using a cream eye shadow, you can be liberal with the blending. Start from the crease and move upwards.
Once you have the colour on your eyelids, you can apply the eyeshadow to your lids using a blending brush. It is important to hold the brush at a 90-degree angle to avoid blending your colours too high. When blending eyeshadows across the crease, use the tip of the brush, which is the fluffiest.
After applying eye makeup, clean the edges with micellar water or cotton pads. It is important to use clean and reusable cotton pads. You can also use a blending brush to clean the edges of your eyeshadow. The technique is simple and will remove fallout without damaging the base makeup.
Apply a base colour on your eyelid that matches your skin tone. Next, apply a darker shade in the eyelid’s crease, starting from the outer corner and ending short of the inner corner. Finally, use a new brush to blend the crease colour and the centre of your lid. Blending eyeshadows is essential to creating a smooth, flawless look.
Applying eyeshadow up to eyebrows
Applying eyeshadow to your eyebrows can create a dramatic look on your lid. Then, drag the shadow up towards your brow with a domed brush for an even more dramatic look. This technique also creates the illusion of sleepy purple circles underneath your eyes.
Begin by applying a light shade of eyeshadow to the brow bone. Once it has dried, blend it in with a translucent powder. Next, apply your darkest shadow colour up to your crease. Blend the transition smoothly. Depending on your eye shape, you may need to add more than one shade.
Eyeshadow can be intimidating, but it can make any colour pop when applied correctly. It can also be intimidating to work with natural colour pigments. However, you can get that eyeshadow look without looking like a Caboodle with a little strategy and patience. While there is no single correct way to apply eyeshadow, there are a few basic techniques you should follow.
After defining your eyes with a light or medium eyeshadow shade, you should add another shade to the inner corner of the eye. This shade should be slightly darker than your natural skin colour. Then, you can apply the colour in a few different layers and blend it with a fluffy brush.
You can use an eyebrow highlighter on the inner eyelid to achieve a brighter, wider look. It will create the illusion of a wider, perkier gaze. Unfortunately, you can also smudge the highlighter underneath your brow bone. The Byrdie team recommends using the Sisley-Paris Eyebrow Highlight.
Applying eyeshadow to hooded eyes
If your eyes are hooded, applying eyeshadow can be difficult. This is because there is very little to no eyelid visible when the eyelid is open, making it difficult to see where your eyeshadow is going. To remedy this, apply base powder or cream on the eyelid to create a smooth base for the eyeshadow to rest on. Then, apply a light shade of eyeshadow under the brow bone, lightening and highlighting the entire eye.
When applying eyeshadow to hooded eyes, use a fluffy brush to place the product in the crease area. Make sure to follow the crease line. This will help lift the eye, making it appear bigger and brighter. You can complete this lifted look by applying the same shadow to the lower lash line. You should also avoid creating a disconnected wing line to look like your eyelids are drooping.
If you have dark skin and a hooded eye, you may want to avoid a dark shade on your crease. A softer colour on the lid will create a more youthful appearance. You can also use a light colour on the upper brow to create an illusion of a higher lid. Finally, a shimmer will add a little extra depth to your eyes.
To create a sunset-like effect, you can use the Lime Crime Olympia to set the shadow and Lime Crime Nymph to build a deeper colour on the lid. You can also use JD Glow Opal to soften any copper tones. Finally, apply the eyeshadow using a Sigma E25 brush.
Using red lipstick as eyeshadow
Using red lipstick as eyeshadow is an excellent way to add a pop of colour to your eyes without going overboard. Applying this look is easier than you think. Helen Mirren pairs a bright red lip stain with a flawless base, a natural blush on the cheek, and metallic cream eyeshadow. This combination is dramatic and flattering and will make your eyes appear wider than they already are.
Red lipstick makes an amazing eyeshadow when worn alone, but you can also blend it with other colours to get a unique look. Liquid formulas are also easier to blend than bullet lipsticks. In addition, red lipstick usually contains carmine, a natural substance from insects. However, you should be cautious with this type of makeup.
Liquid lipstick is the easiest to use as eyeshadow. It allows for smooth application and is available in various colours, from neutral to bold. Using it as an eyeshadow is an excellent way to create a professional or fun party look. If unsure about its suitability for eyeshadow, try a tiny dot on a small area of the skin to see how it looks.
The key to using red lipstick as eyeshadow is to choose the right shade. You may choose a shade that compliments your skin tone and hair colour. You can even use it as an eyeliner! Then, pair it with a matte or shimmery shadow to make your eyes pop.
Red lipstick is also a great colour corrector. It cancels out the blue and green hues on your face, allowing you to use less opaque makeup. The bold red hue can also be used to flush your cheeks naturally. In addition, the colour can even out shadows and help conceal dark circles.
Using a ring finger to apply eyeshadow
Your ring finger is the best tool for applying eyeshadow because it has the softest touch and won’t irritate your eye. The warmth of your finger will also help melt the primer into your eyelid. Use your ring finger to apply primer over your entire eyelid, including the inner corner and lower lash line. Generally, four shades of eyeshadow should be enough for a basic look.
To apply eye shadow, start at the lash line and move towards the outer and inner corners. If you use a creamy shadow, apply it to the centre of your lid near the lash line and then spread it out to the outer and inner corners. You can apply it to your brow bone and lower lash line if you want a more dramatic look.
If you are using pressed eyeshadow, apply it with your ring finger. It is gentler on the eye skin and applies the colour the best. Also, wash your hands before applying your makeup to avoid breakouts. Using your ring finger to apply eye shadow gives you the best colour payoff and application.
Another benefit of using your finger to apply eyeshadow is that you won’t need to use brushes! This is a great option for anyone who doesn’t have time to apply a brush to their eyelids. Make sure to wash your hands thoroughly before applying eyeshadow, and ensure your nails are clean.